
Vectoring a Face
- how to add sublayers (this is harder than it should be with Inkscape)
- how to lock layers
- how to simplify a complex image
- how to use the blur effect
- how to specify the exact size of a page
 Step 1:
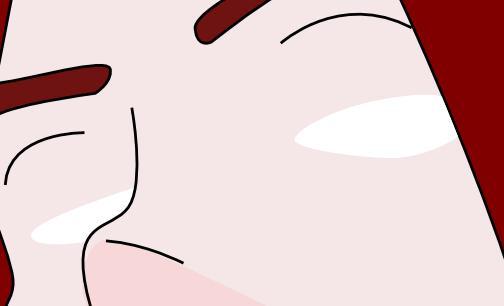
 First, you need to grab an image. Ms. Maletin has kindly volunteered (somewhat - kinda-sorta… well, she didn’t outright object… well – when she outright objected, she didn’t seem to stay upset. For long. You know what, lets just keep this quiet, alright?) an image to be used for this assignment.
You’ll need to toss this image into Inkscape, and that shouldn’t be a problem by now. Nope. You have the excellent skill sets that allow for copying and pasting. Good for you. So go to it, open up inkscape, and throw this image in. You will see that it’s on its own layer.
Note: when creating objects, fill them with whatever colour you think works best.
 Aside:
 A vectored image can be resized to any dimensions you want, without losing quality. Unlike this rastered image above, you could resize the vector file to be as big as thirty football fields, and it would still remain crisp and clean – not pixelated. The reason for this is because we’re not working by changing one or two pixels. Remember the complex math I told you about before? The stuff that you don’t need to know about? Well – through it’s magic, the curves keep the image produced perfectly. But enough of that, lets get creating.
Step 2:
You need to get back into the Document Properties (remember you can do this through the File menu, or with the CTRL+SHIFT+D hotkey.) Once you’re there, you need to look for the box that reads “Custom Size.”
Here you can edit the Height and Width of your document. You want to input a width of 1024.00, and a height of 768. The units should be px (this stands for pixels. If you make the document 1023x768 inches, it will be ridiculously big, and might slow down your editing process.
Once you’ve input these numbers you should notice that the size or shape of your Page changes to reflect this new information. Good for you, you have now set yourself up to get started creating a wallpaper.
 Step 3:
Resize the image so the face takes up a large part of your page, and is – more or less – centered. Then, open the Layers Pallet and click the little lock beside the background layer. This will prevent you from moving the image, or accidentally selecting it when you’re editing the vectored image.
Step 4:
Alright – here’s where things can get really tricky really fast. We’re going to start using sublayers. In most programs you can drag and drop layers to achieve this, which makes it simple. Here you need to think ahead, and create layers properly.
 Never mind all that though, we’ll learn by doing it. Click on the PLUS to add a new layer. Note that it says Position: Above Current. That’s good for now. Click Add. Rename the layer to “Maletin Face”.
Now you need to have Maletin Face selected as a layer. You’ll click the plus once more to add a new layer. This time you will call the layer “Face Base.” As for the position, it will be a “As a sublayer of current.” Then click on Add.
You have just created your first sublayer. Note that Maletin Face now has a little minus sign beside it? That will allow you to expand / close the sublayers. There is a reason why you will want to do this, and I will explain it to you now.
Aside:
Sublayers do nothing for the editing process. Neither do layers for that matter. You could create your whole image on one layer if you wanted to, but when it comes time to edit, and fix things up it will be a terribly messy operation. Think of layers as a way to organize your progress. You can select everything on one layer, and affect it separate from other pieces.
You can also easily turn layers on and off to see behind them, and visualize how one layer affects another. Sublayers are a way to group pieces of similar information together.
Because sublayers are so tricky in this program, I will accept if you don’t want to use them – but it may make things simple for you. When I tell you to make a new sublayer, you can choose to follow those instructions, or continue to just make regular layers. That choice is yours to make. But try out both styles to see what works for you.
 Step 5:
With Face Base selected, trace the basic shape of Ms. Maletin’s face. You must be precise on the left side of her face, but if you overlap her hair, that’s fine – the foreground hair layer will be on top of the face base, thus covering up the overlap. Note that we’re also ignoring her hand, as if it doesn’t exist? Look back at the final image, shown at the top of this tutorial. No hand to be seen at all. While vectoring we can ignore objects we don’t think would benefit the final image.
Step 6:
Create a new layer named Foreground Hair. Trace the hair, once more pretending that her hand isn’t there. You should start from the center point of her part, and work down, making sure to curve with the shape. At the bottom of the hair, you can choose to create a design that makes it look more natural than a straight line would.
 Once finished, create a layer called Background Hair and move it below “Face Base.”
Trace Maletin’s hair precisely along the left side, where it will be seen. Once behind the skin layer, however, you can do whatever you want, as it will be hidden by the Face Base layer.
Once complete you will have the basic pieces required to make a face. Good for you, you’re – well, you’re on your way.
Step 7:
Remember that little minus sign beside Maletin Face? Well now it’s time to click it. If you have been creating sublayers, you will notice that they all disappeared. Don’t worry they still exist, you just can’t see them individually anymore. Isn’t that a cleaner way to edit images? Also – since you need to turn off all the hair and face objects that you just made, you can now click on the eye for Maletin Face and all three will turn off at once.
Give it a shot, and turn it on and off a few times to familiarize yourself with the process.
Right. Next, create a layer (not a sublayer, but a brand new layer) and call it “Face Features.” Position this layer above Maletin Face.
 Next, create a sublayer of facial features and call it “Lips.”
Next, create a sublayer of “lips” (yes you can make sublayers of sublayers) and call it “top lip.”
Finally, trace Maletin’s top lip.
It should seem obvious, but the next step is to create a new layer called “bottom lip.” This should be a sublayer of “Lips” as well. Move the “bottom lip” layer below “top lip.” This way you need only be precise when editing the lower half of this lip. The top will be covered by the “top lip” layer.
Once the lip has been created, you can press the minus sign to close the sublayers, leaving you with a well organized file, and two lips floating on the image. Phew! That was a big step, but it’s building upon skills we already have. I’m sure you all got through it fine, right? Otherwise just cry out: “Sir! I need help! Sir! Sir! MEDIC!” Someone’s bound to show up, yeah?
 Step 8:
It’s time to do some fine details. Note that rather than adding colour for every dark and light stop, there are a relatively small amount of colours in the final image. The only real colour change on Maletin’s face is the slight shadow to represent her nose. The reason these shadows are not needed more than that is because some detail lines imply depth.
These lines are used for her nose, her chin, and the indentations above her eyes.
Create a layer called “face lines” as a sublayer of “Face Features” and draw in the required lines, being sure to cure them precisely.
You will do this with the curves tool. Rather than having the end of the object finish when you close the object, you can [right click] the mouse to end your current curve.
If you turn back on Maletin Face, you will notice that things are finally starting to look the way they should. There’s a face there after all!
 Step 9:
Make a new sublayer of Face Features and call it “nose shadow.” Trace the shadow of her nose, while using the black lines you’ve created as a guide. You can use them to form your curves, as the nose shadow layer should be placed below “face lines” This will make the lines tight, and clean.
Now create a layer, also sublayered of “Face Features” and call it “eye brows.” The instruction here should go without saying by this point, but for posterity I will tell you that now you should trace her eyebrows.
We’re almost done… all that’s left are the eyes. It’s just to bad that they happen to be some of the most difficult things to work on.
 Step 10:
 Create a sublayer of “Face Features” and call it “Eyes.” Then create a sublayer of “Eyes” and call it “white eye.” You will now need to turn off “Maletin Face.”
Trace the entire eye until you are satisfied with your results. Note how I used the line of her nose to blend the left eye smoothly with her face. This is accomplished by simply moving the “Eyes” layer below the “face lines” layer.
For the first time, I want you to turn off the “Stroke Line” in the Fill and Stroke pallet. White the stroke lines work well with other aspects of this image, eyes should be clean. You will also need to do this to ensure a smooth clean line where the right eye blends with the foreground hair.
Step 11:
Create a new sublayer of Eyes and call it “iris.” Here you will trace the coloured parts of her eyes, the Irises. They may be hard to see, but you should be able to figure it out. I have faith. The “iris” layer must be on top of the “white eye” later. You will also need to turn off the “white eye” layer to trace these objects.
Next create a new sublayer of “Eyes” and call in “pupils”. This should be on top of “iris.” Here you just need to add black circles where you think they best fit. At times an oval may work better to imply directed sight.
Now we’re down to the final step of the face.
 Step 12:
Create one final sublayer of “Eyes” and call it “lashes.” Here you will trace the curves of her eye lashes, turning a complex number of single hairs into one tight object. Putting some points on the brows, as I have done, can add to the stylistic interpretation, as well as add a sense of menace to the final product.

Note: You’re almost done. All that’s left is the final two steps to turn this image from a sweetly vectored cartoon simplification into a sweetly vectored cartoon simplification that you can use as your desktop wallpaper – you know, if you were into that sort of thing.
Step 13:
Create a layer – a real layer, not a sub layer – below “Maletin Face” and call it “Black.” This can be either below or above “background,” as when you export the final image you’ll have the background image turned off. In “Black” you should create a big black box using the rectangle tool (below the magnifying glass). The black box should be the same size as your page, matching it exactly, or being slightly bigger.
Step 14:
Finally create a layer just above “Black” and call it “Blur.” Here you will create the misting blue effect in the background.
Create a curved object, looking like a blob, around her head. Fill it blue.
Next open up the Fill and Stroke pallet, and, with the blue blob selected, drag the “Blur” slider to 46%, and the Opacity slider to 77%. The blue number creates more or less bluring of the object. The Opacity slider makes it more see-through.


Oh my gosh! It looks like you’re done! All you need to do is export the file, and you’ll have a nice new desktop wallpaper!
Step 15:
Go to File / Export Bitmap (or press CTRL + SHIFT + E). There are a lot of options here, and we’ll explore them more later. For now, just follow along. When looking at the Export Area, select “Page.” This should change the size to 1024x768 (which you set way back in the first step.)
Under filename, choose a directory that you know the location of, and name the file “Maletin Wallpaper.png” Click export.
Open up that file, and you’re done. Wallpaper created. Good for you! Success! Achievement Unlocked! We out.

Assignment:Once you have finished the above tutorial find a suitable picture of your face (or take one, yourself). Vector the image of your face using proper layers. By this point you should have all the skills you need to create a full image without step by step instructions.
Your face vector will be evaluated on the following criteria:
Knowledge
- Vectored image shows use of layers via. overlapping channels
- Long smooth curves are evident, rather than many nodes creating a blocky curved line
Thinking
- Colour selection is relatively photo accurate
- Shading is appropriate for the image you selected
Communication
- Accurate representation of your face
- Shows an understanding of the assignment's tutorial
Application
- Accurately follows tutorial instructions
- Results in a well developed stylized image of you, suitable for logo purposes
No comments:
Post a Comment