
- Vectoring is a basic way to turn a complex design into something more basic, and – appealing.
- Vectoring uses all sorts of complex math and curves to draw shapes and images… luckily you don’t need to know any of that to make your pictures. You just need to know how to use a computer mouse.
- We are using the free software Inkscape which you can download for your home computer at inkscape.org
- Inkscape may take some time to get familiar with, but – honest and true – it’s far easier than you may think it will be.
But we're going to start with something simple. We're going to start with getting you to trace a circle.
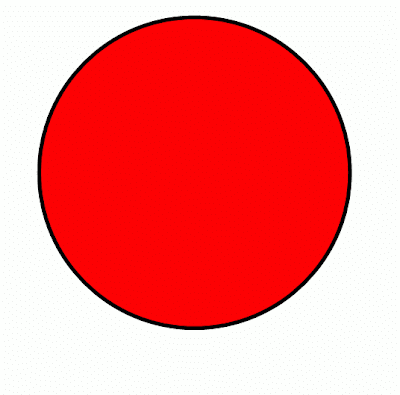
Instruction #1: right click on the circle image below, and save it to your computer.
Instruction #2: open inkscape on your computer.
Instruction #3: drag the circle into inkscape.
Instruction #4: you will notice that the circle appears in a dotted square box. Drag that circle so that it is fully within the black rectangle within Inkscape. [this black rectangle is known as "your page".
While you can work outside of "your page" when you render (save the final image) only things within "your page" will be shown.
You should now see a screen that resembles the one below:

Instruction #5: Zoom into your circle as close as you can, while still showing the whole thing. You can do this by clicking the “microscope tool”, or by holding down the [CTRL] key while moving the mouse wheel up or down. ([SHIFT] + microscope tool zooms out.)

Instruction #6: Let the math begin (again, we don’t need to worry about the math. You just need to click the button that allows you to draw curves. It’s the eleventh from the top. It’s below the pencil. It’s a blue writing tool with a line that has a square attached to it. Can’t miss it:

Instruction #7: Now it’s time to start drawing your circle on top with the “curves tool”. But how do we do that?
Click on the screen. You will see that a box just appeared with a red line attached to it. Click again, another red line jumps out. You can keep clicking all you want, until you click the first box and complete the “shape.”
Once the “shape” is complete you can select it, and change it’s colour, move it around – or, in this case, delete it.
Instruction #8: With the “curves tool” selected, you need to click at the left, top, right, and bottom of the circle. The points of where to click are shown on the circle below:

But wait, you say – you’ve now ended up creating a diamond. That’s not right. Still – this allows up the opportunity to explore how colouring an object works.
Instruction #9: Down at the bottom of the screen you will see a row of coloured boxes. These represent the “fill colour” (don’t worry about this yet – just know you’re choosing what colour the “shape” will be.) Select blue.
You will now have a blue diamond in a red circle:

Instruction #10: It’s time to edit our shape. You can modify any shape you have already created. To do this click the second tool from the top (an arrow pointing at the middle of three squares on a line.) This is the “edit shapes” tool.

Instruction #11: You will notice the row at the top of your screen has changed. There are new tools and icons. Make sure the second from the end is clicked (depressed.) This will show “handles”. Trust me, this will become clear soon.
You are now looking at a screen that shows the blue diamond, with a box at each joint. You can click on them and move them around if you’d like – go on and try. But then, put them back in their original position.
Instruction #12: With the [SHIFT] key held down, click on one of those squares (they’re really called “nodes”) and then drag (move the mouse with the left button held down) away from the “node”
You’ll notice a blue line attaches to the “node.” This is the “handle”. See how by moving the handle you’re changing the curve, allowing the shape to become more of a circle?

Do this for all the nodes, until the blue circle covers the red one.

Instruction #13: Yes, of course there is an easier way. Delete the blue circle, and then select the “curves tool” again. This time, click to place your first square. When you click to place your second square do not let go of the mouse button. Click and drag to pull a “handle” out and curve your line.
This may require some experimentation to get right, but eventually you will be able to trace your circle by clicking and dragging “handles” using the “curves tool.”
Final Instruction: Once you have finished tracing the circle above, you should do the same with the two shapes below. You can choose to make them any colour you wish.


Bonus Instruction:[Removed]
Tomorrow we will be looking at how to create images like this, and I will provide step by step directions - but for now, if you want to try and figure it out, go ahead. There are more tutorials you can look at in the previous post, and you may also want to google +inkscape +tutorials to find more information.
No comments:
Post a Comment